In this tutorial we build the simplest possible pre-amplifier that shields environmental e-field noise and boosts our sound quality very effectively.
Note that this amplifier only works on microphone input channels, where — typically — a 3.3V power source is supplied. Any microphone input that works with an electret mic (e.g. simple headset microphone) will work. Instead of a standard electret mic, we use our custom piezo preamp.
This tutorial aims at beginners with just a laptop/computer. If you are a musician and already own an audio interface which has a “High-Z” or “Instrument” input (sometimes it has a guitar printed on), then you can simply solder the instrument cable directly to the disk without any circuitry.
Introduction
We like to use audio streams to play our physical sound models. That means we stream an audio channel to the input of our virtual instruments and use that audio signal to articulate the sound (instead of a midi keyboard). This brings much higher resolution and the ability to control virtual instruments as if they are acoustic instruments.
To imitate a percussive surface like a snare drum membrane, you can use a piezo disc to pick up structure-borne vibrations from any object and feed them to our snare drum plugin. Attaching this disc to your desk essentially transforms it to a sound sensitive surface – a surface that you can use to play virtual instruments with a high level of sound control, resembling the feel of an acoustic instrument.
The Circuit
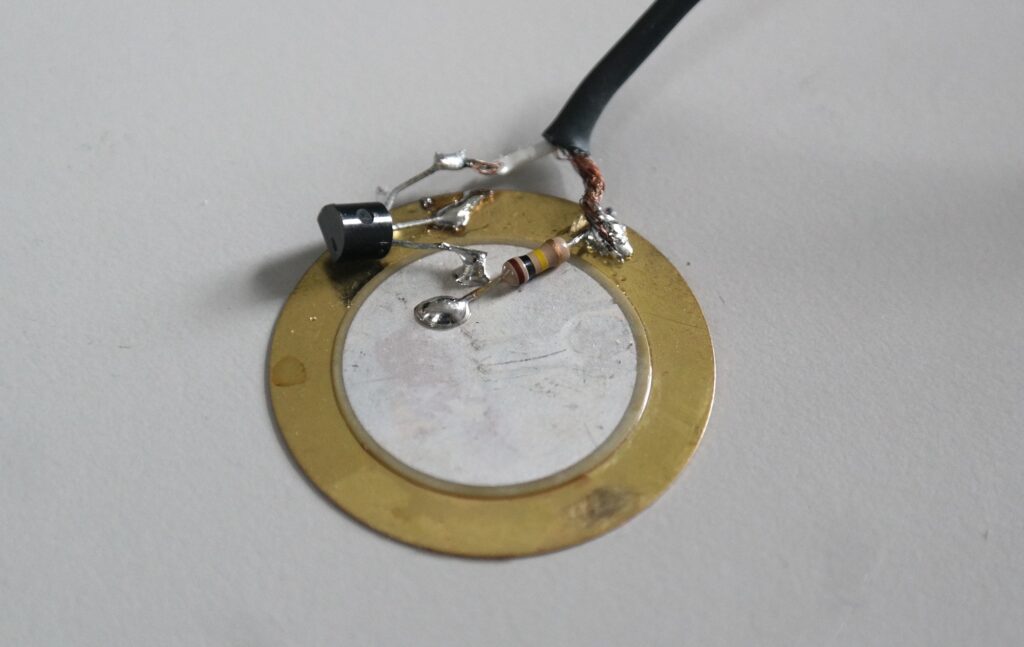
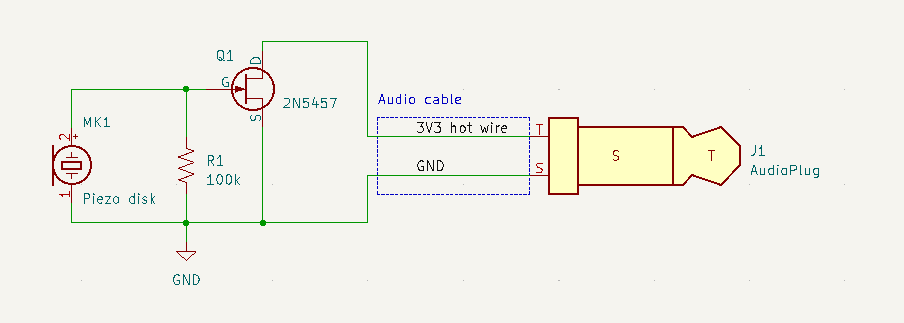
Piezo discs have a very low-current output signal and are thus very susceptible to noise from the environment (e.g. mains humming). Also, the low current and capacitance of the disc forms a natural high pass filter with your microphone input amplifier. To enhance the signal quality a pre-amplifier that boosts the current from the piezo disc is needed and thus gives you more bass response. Our simple and effective circuit consists just of a JFET transistor and a resistor (Fig.2). The transistor should be as close as possible to the disc to effectively protect your signal against environmental noise. You can solder an audio cable to the disc and a 3.5mm audio jack (mono or stereo) on the other end.
A typical (headset-) microphone input circuit has a resistor and a capacitor included that complete the circuit to be a proper (and simple) JFET amplifier (Fig.3).
Needed Components
-
10-25mm piezo disc (bigger ones are more sensitive)
-
audio cable
-
audio jack (mono or stereo)
-
a transistor of one of the following types:
- 2N5457
- NTE457
- 2N5457
- MMBFJ201 (small SMD transistor – should have the best characteristics)
- J201 (bigger version but not so easy to get, or expensive)
-
a resistor in the range of 20kOhm to 100kOhm
You might also be successful with other n-channel JFET transistor types, but not all off them work with the current and bias from your microphone input supply.
Soldering
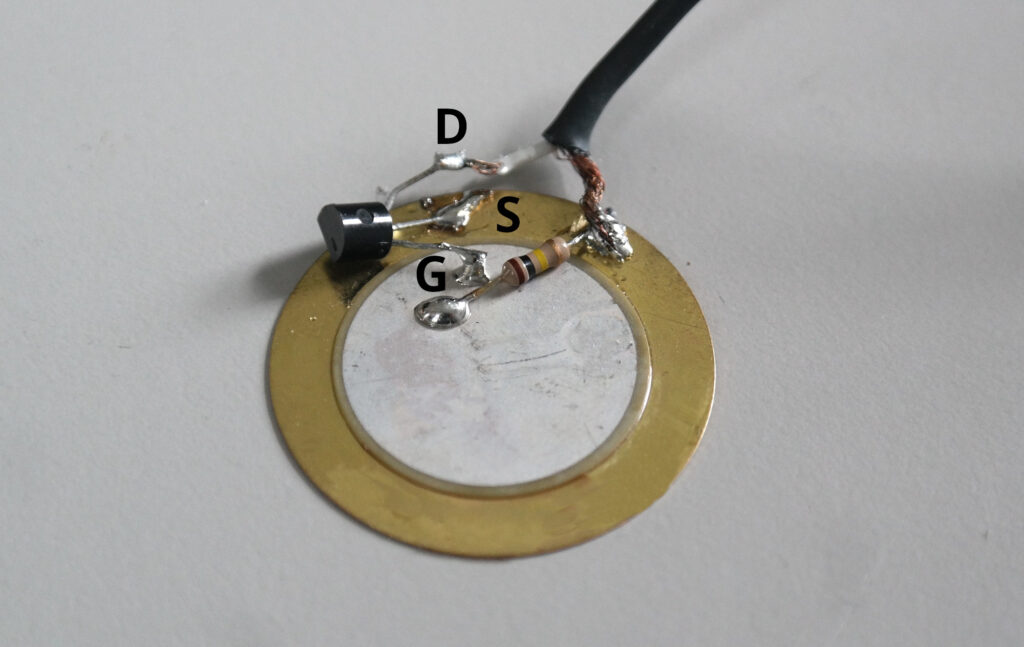
Solder the transistor as shown in Figure 4. Please check the datasheet of your particular transistor to be sure that the drain (D), gate (G) and source (S) terminals agree with the picture and correct the connections if necessary. Different manufacturers might swap the pins for the same 2N5457 transistor type.
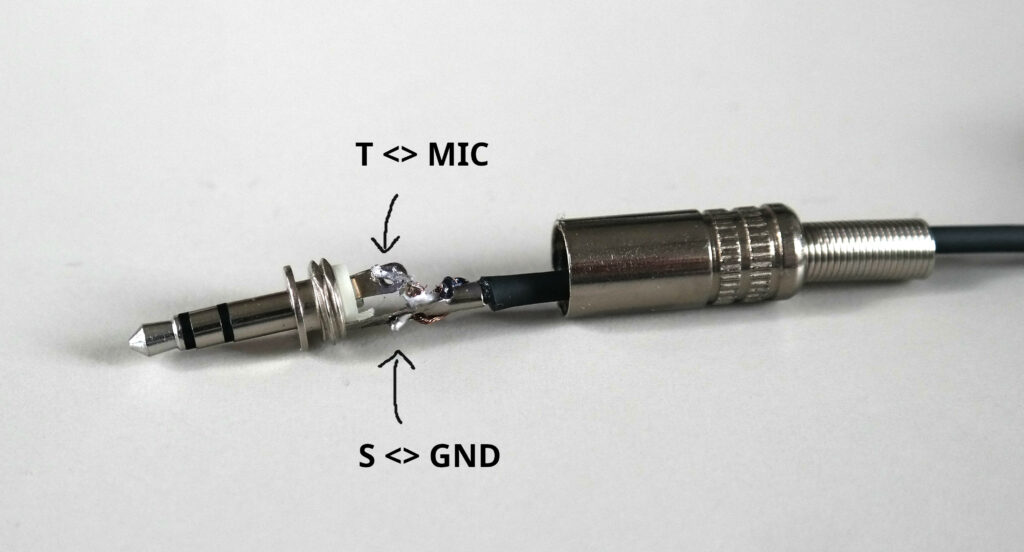
The jack needs the signal (MIC) connection on the tip (T) and the ground connection (GND) on the sleeve (S) as shown in the picture. It works with both, mono and stereo jacks. With a stereo jack, you can either leave the right channel ® unconnected or short it to the left channel (tip) where you connect your microphone signal.
Connecting with the EXC!TE Snare Drum Pro or EXC!TE Cymbal Pro Plugins
Connect to your Microphone Input
There are three types of microphone inputs that we have to consider:
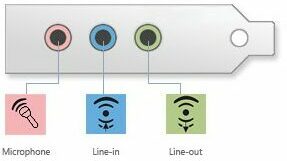
- A dedicated microphone input port as desktop computers have: Here you can plug your 3.5mm jack to the red microphone input port directly (fig.6).
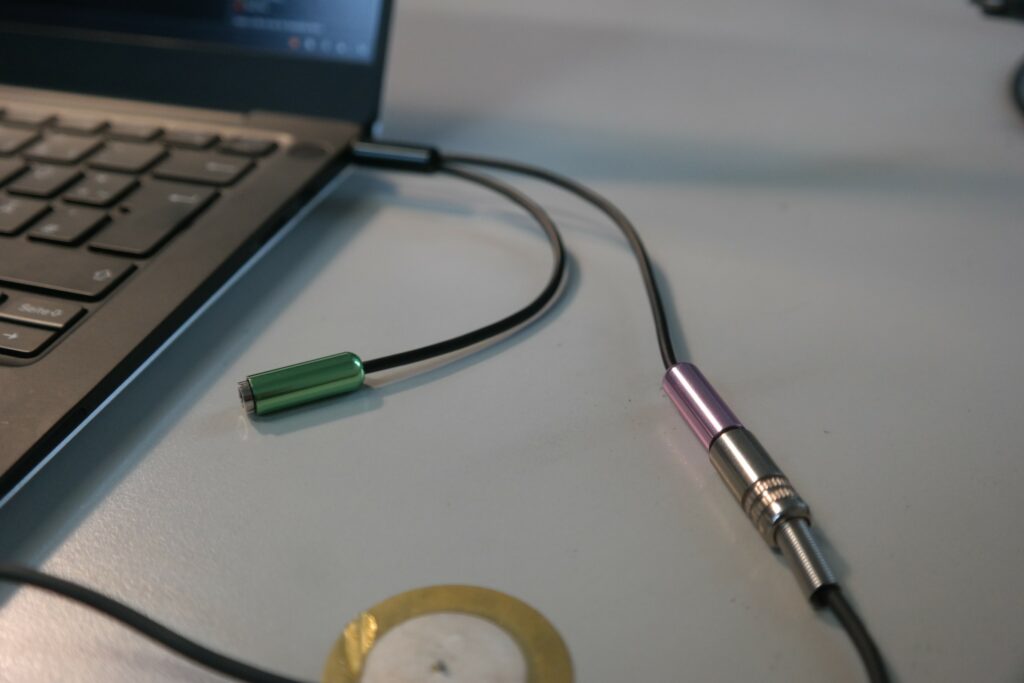
- A headset microphone input as found on most laptops. To connect your piezo disc to the headset input, you need an additional Y-adapter cable as shown in figure 7.
- An apple headset microphone input. Here you need to additionally connect an original apple headset to the audio output of your Y-adapter cable. This is to circumvent their apple hardware lock-in. While your computer is asleep you can actually unplug the original apple hardware and our piezo input will continue to work just fine.
Setup your DAW
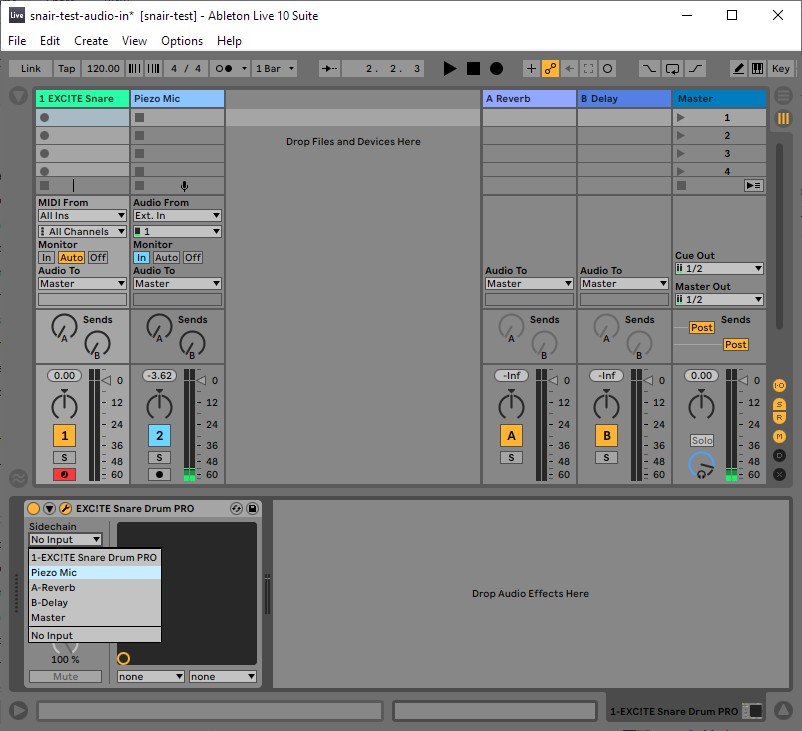
If you own the PRO version of our snare drum plugin, you can now route your microphone signal to the sidechain input of the plugin and adjust levels and the frequency shift control to fine tune the sound. Try to reduce latency by minimizing your audio block size to get best playability results! In figure 8 a basic setup is shown for Ableton Live 10.
Summary and Outlook
This is the easiest and cheapest way to get into the world of contact mics. It is powered by a hotwire electret mic input, which is the non-professional audio input your PC will usually has in-build. If you want to upgrade to a more professional setup with a proper audio interface and preamp, look into theses sources:
- LOM: Contact microphones
- Michael Krzyzaniak: Marshmallow Piezo Preamps
- SYRO Instruments: Mikrokontakt
- Leaf-Audio: Contact Mic
- Jez Riley French (UK)
- OAKA Tellus (UK)
- Phantom powered piezo pickup: Plonk
- Stomville Piezo preamps
We also tried piezo mics meant to be installed in instruments like the Schaller Oyster and found the signal level to be very faint. Not adequate for our usecase. If you have more suggestions for contact mics, let us know.